
Installing Accessories for the Rollator
To enable us to simulate various animals of different sizes, we have developed accessories for a Weinsberg rollator that make it easy to mount and transport the camera and laptop. These instructions show how to assemble the various parts. You will need the rollator (Product Page), a size 5mm Allen wrench, and a size 13mm open-end or ring wrench. The rollator must be fully assembled before you install the accessories. It is advisable to have a second person on hand to help you attach the parts.
Lower Bracket
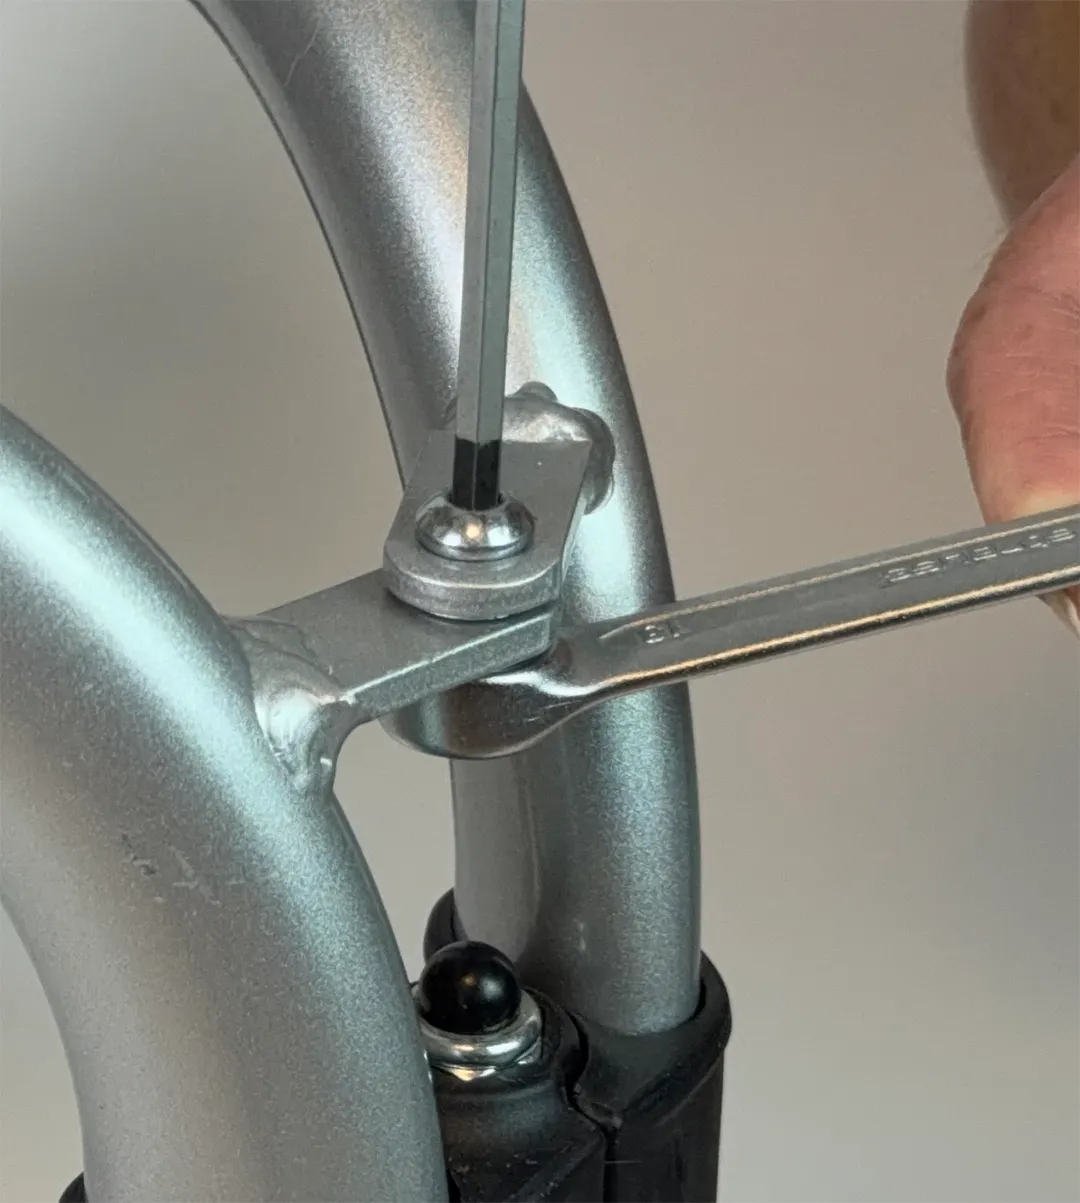
Remove the screw on the lower bracket using a size 5 Allen wrench. While doing so, hold the lower nut in place with a 13 mm open-end or box-end wrench. There is a plastic washer between the two brackets. Be careful not to lose it. The lower nut also has a washer. Be careful not to lose it either.
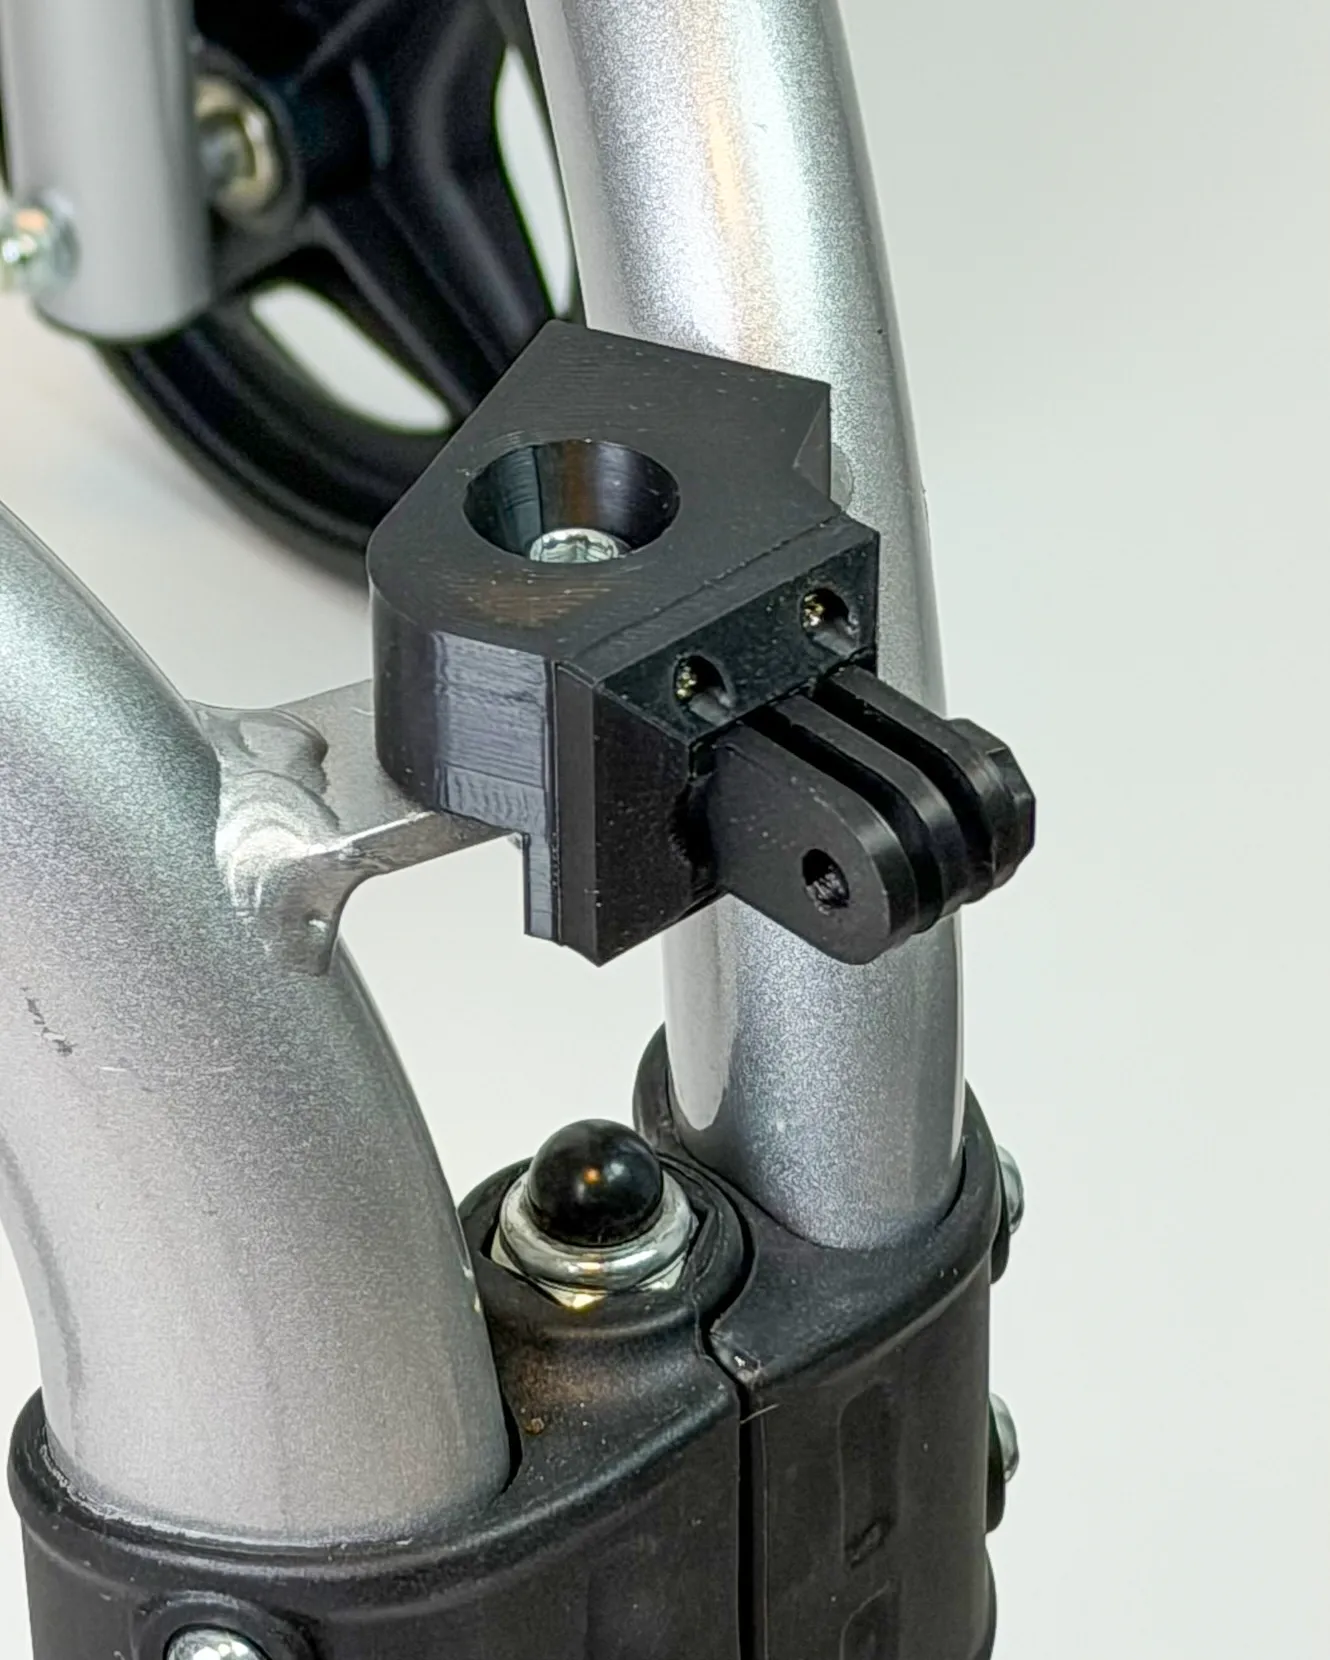
Attach the lower plastic bracket as shown and reinsert the screw. Be careful not to tighten it too much.
Side Brackets
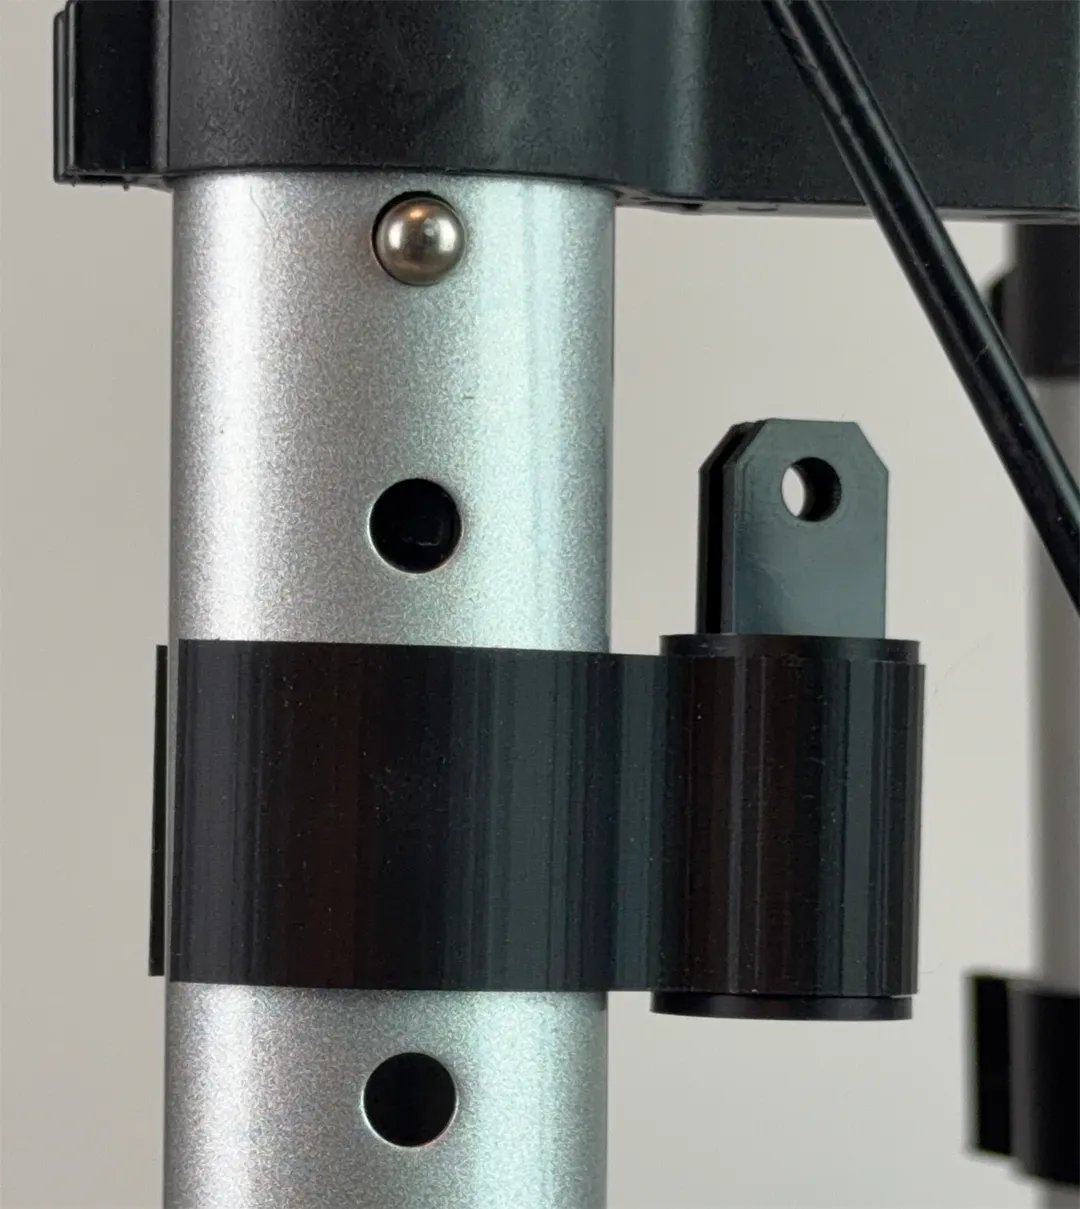
Attach the side brackets to each side of the rollator. The brackets have a locking tab on the inside of each side that snaps into the holes on the rollator. You can hear and feel them snap into place. The rollator’s handles must be fully extended so that the brackets can be attached correctly. Attach the brackets so that there is still one hole free above the bracket.
Perforated bar
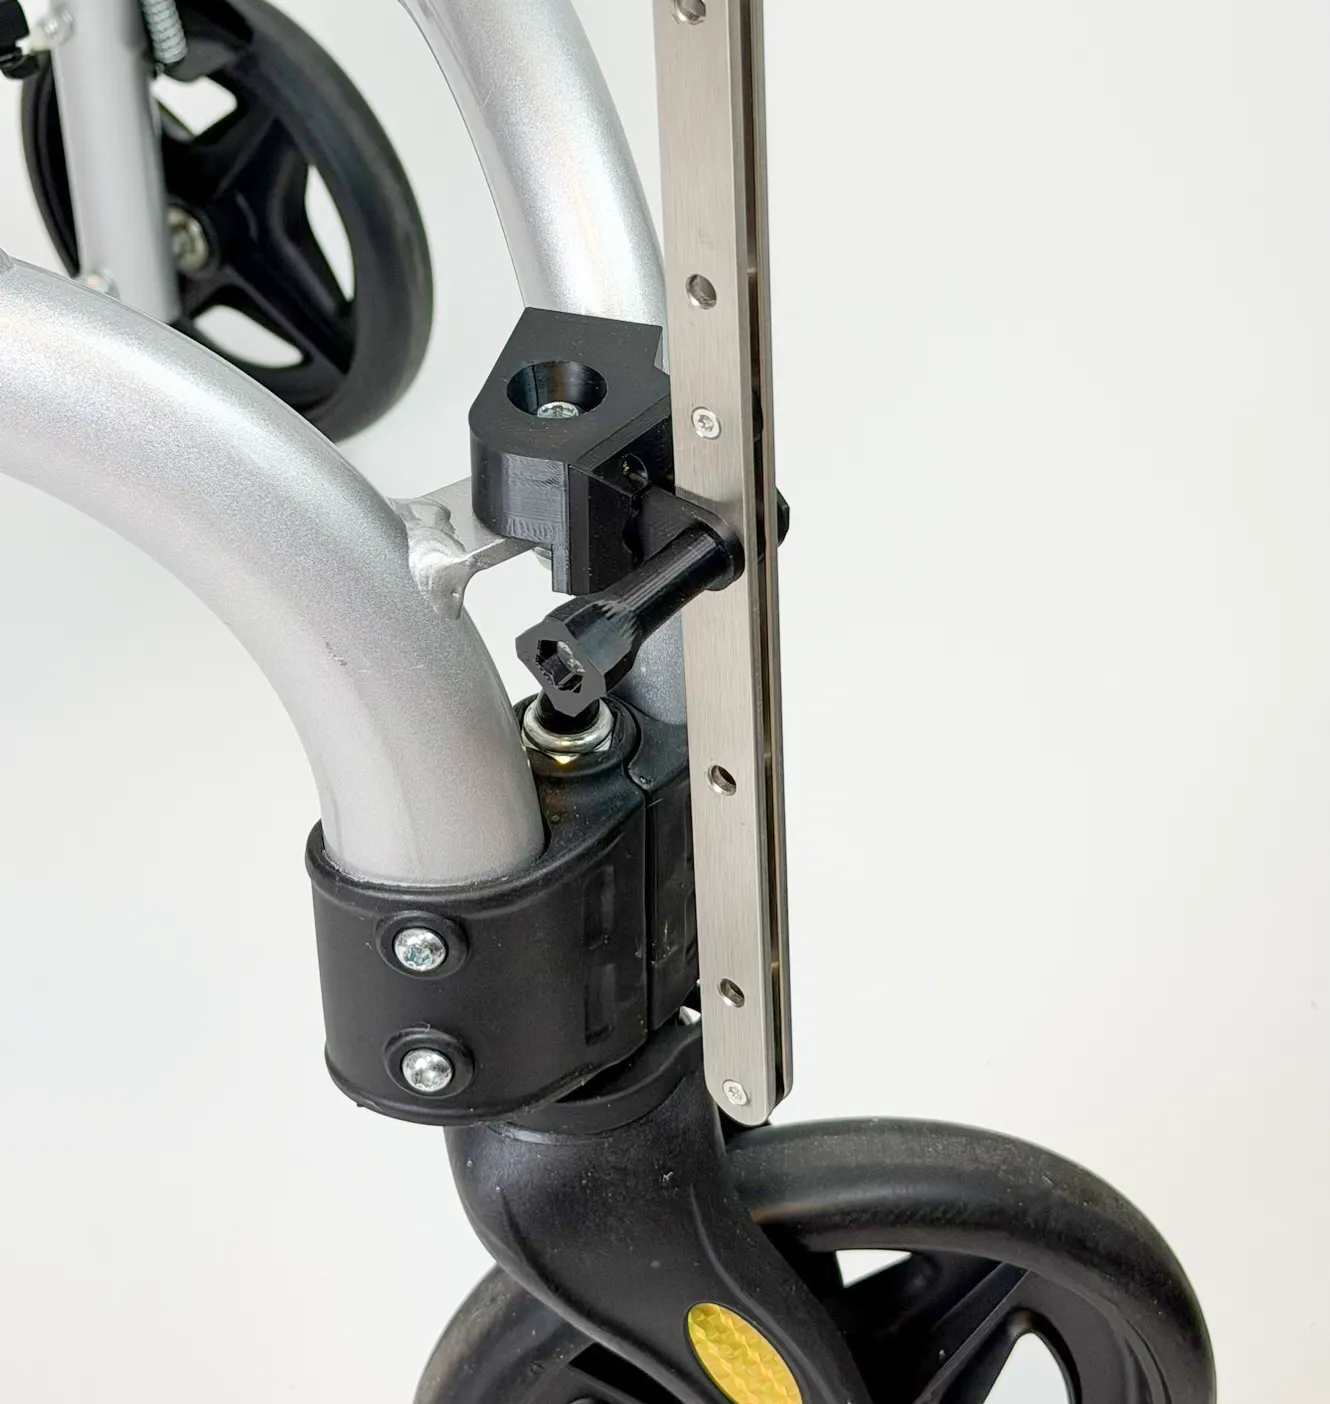
Attach the bar as shown, using one of the long screws. Ask someone to help you and hold the bar in place. If the bar tilts to the side, the bracket may be damaged. On most models of the rollator, you can secure the bar in the third hole from the bottom. The lower holes can then be used, for example, for the pig simulation.
Upper Bracket
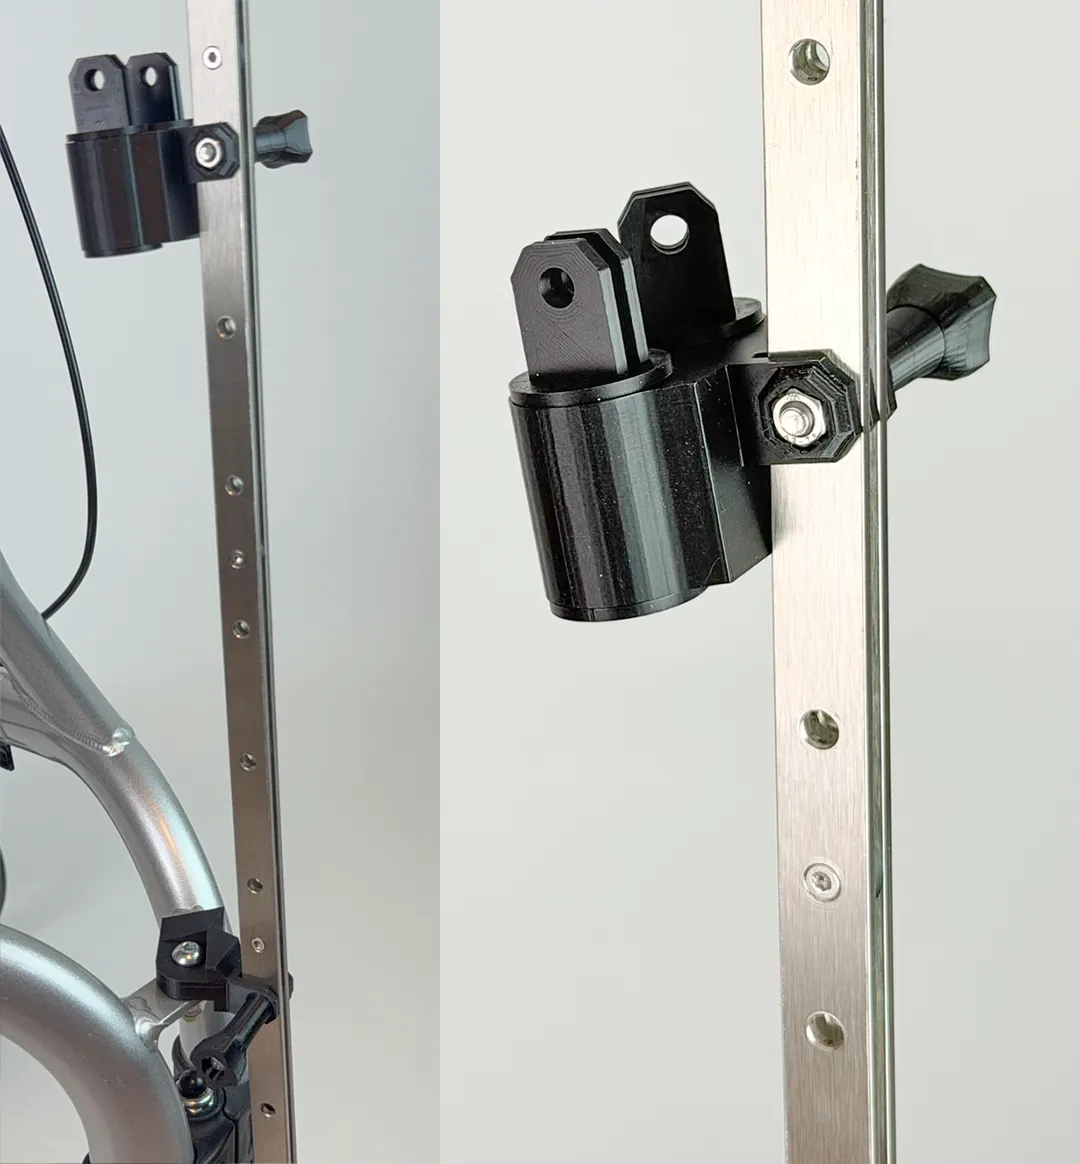
Use one of the long screws to attach the upper bracket as shown. It must be mounted so that it faces the person pushing the rollator. There must be five holes left open in the pole between the upper bracket and the lower attachment point.
Support Bars
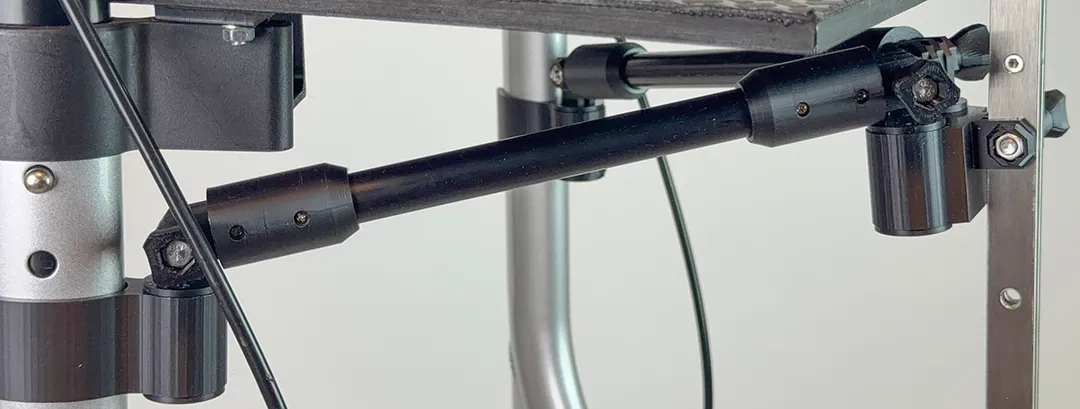
Attach the support bars as shown, using four of the short screws. The bars must be oriented so that the nuts face the inside of the rollator and the screws are visible from the outside. Start by tightening the bars only loosely. Once both bars are installed, you can tighten them fully.
Adapter for Camera Mount
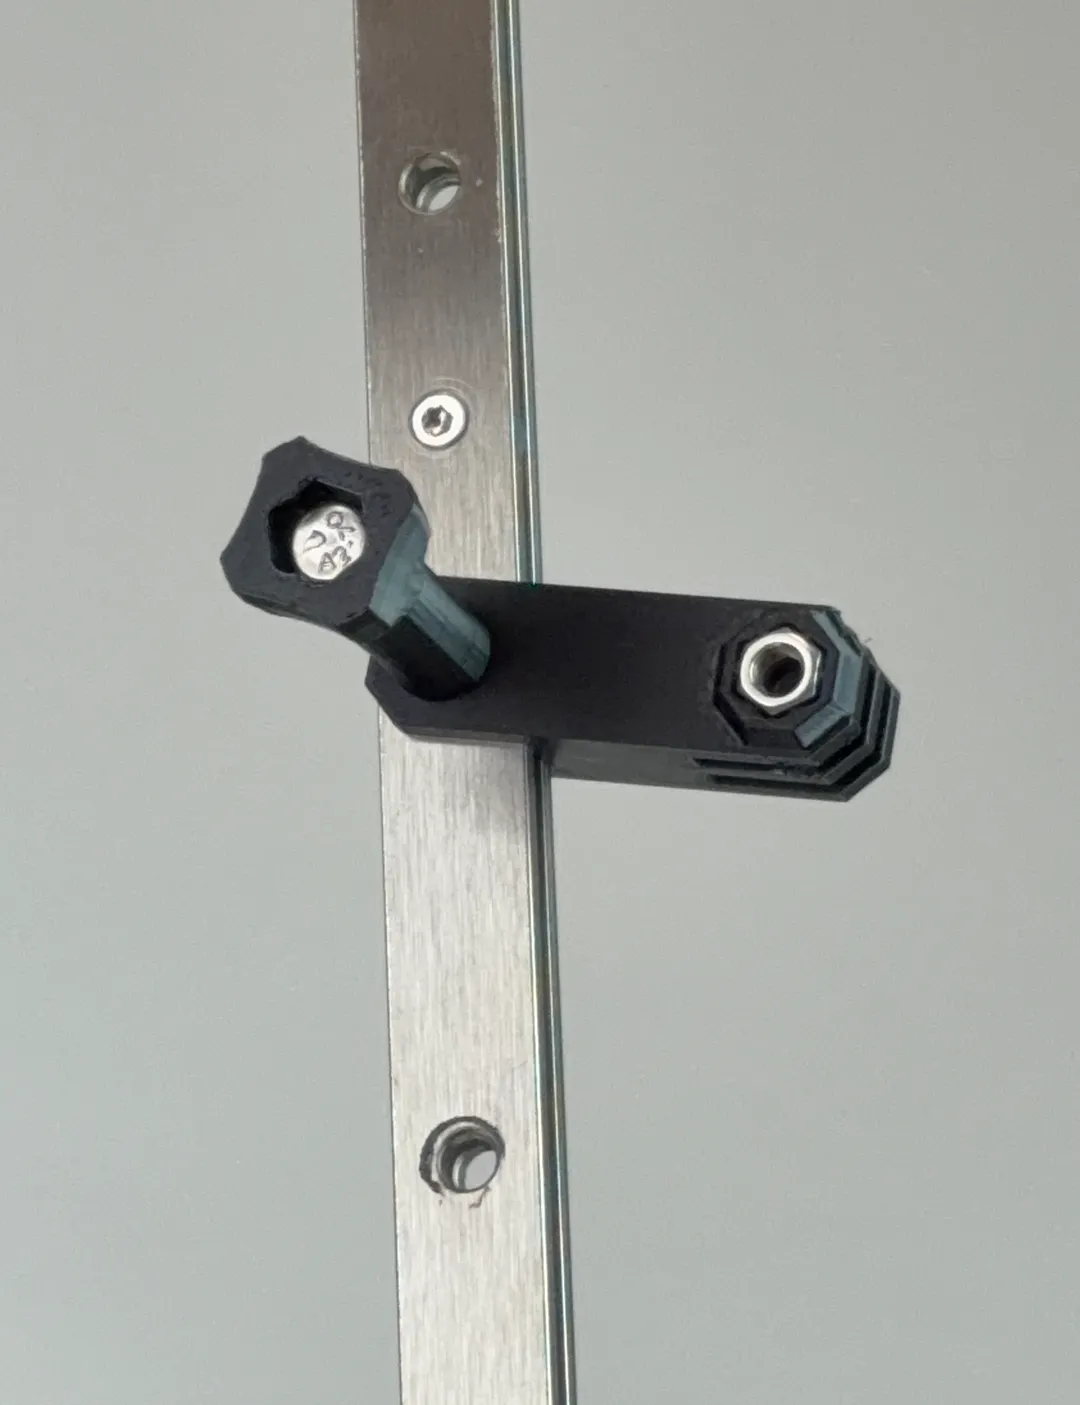
Attach the camera mount adapter as shown using one of the long screws. It’s best to insert the screw on the right side (as viewed from the direction of travel) so that the camera’s cables won’t rub against the protruding screw later on. Position the mount at a height that corresponds to the eye level of the animal you want to simulate. It doesn’t have to be exact to the centimeter; you can still make adjustments later with the camera.
Cable Guides
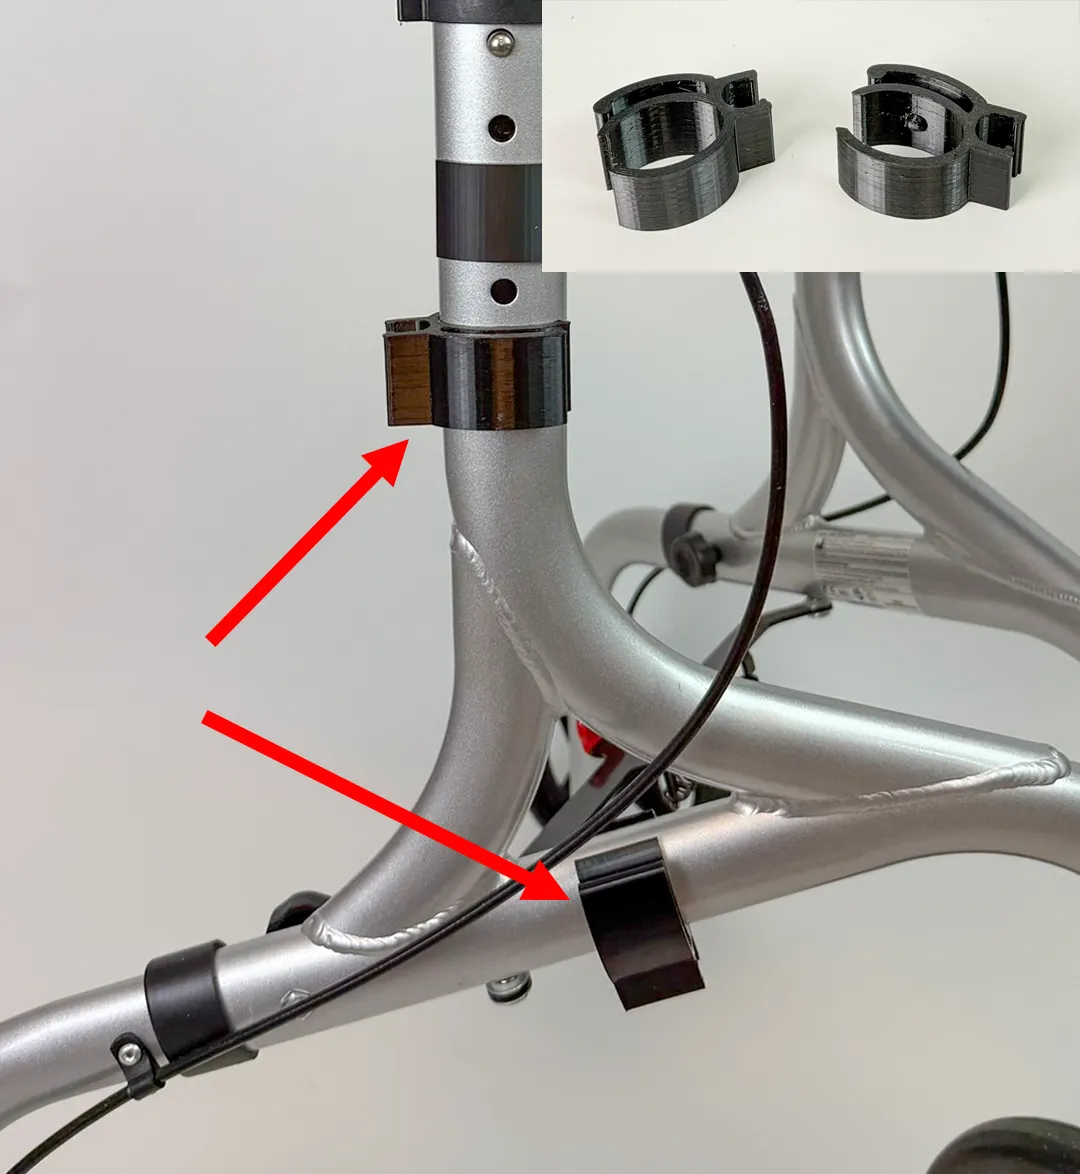
The cable guides can be attached to the rollator as shown. They make it easier to route the cables later. In the upper section, cable guides with a locking tab are used; the guides in the lower section do not have a tab and are simply clamped onto the bar.
Laptop Stand
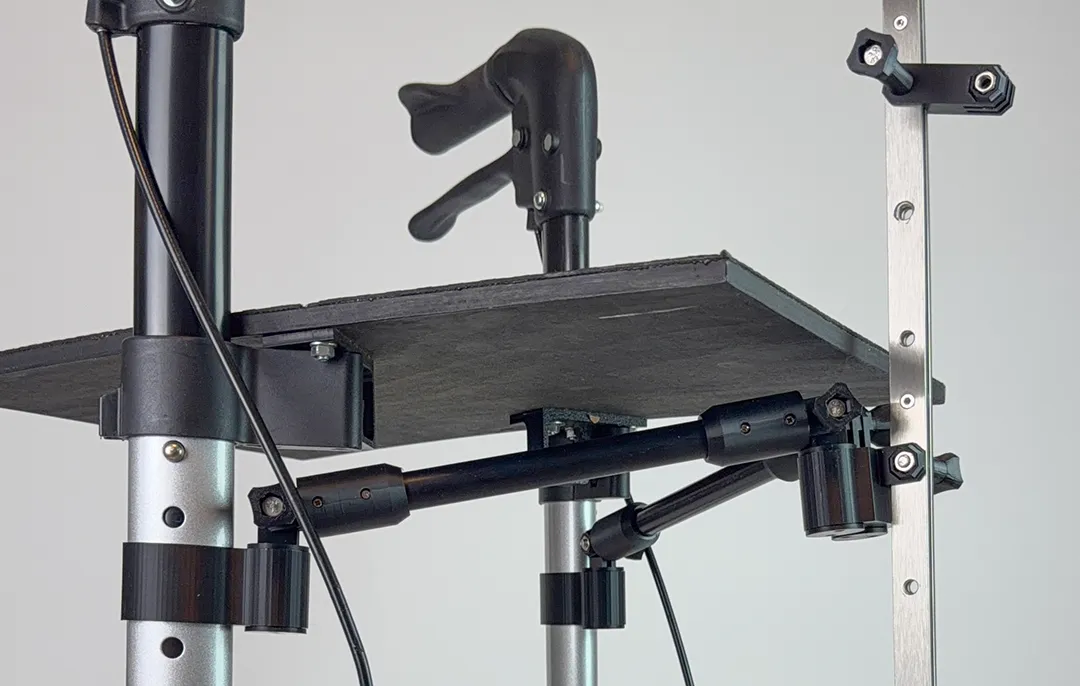
If you haven't already done so, attach the laptop stand to the rollator. It must be slid into the guides that are already factory-installed on the rollator.
Camera
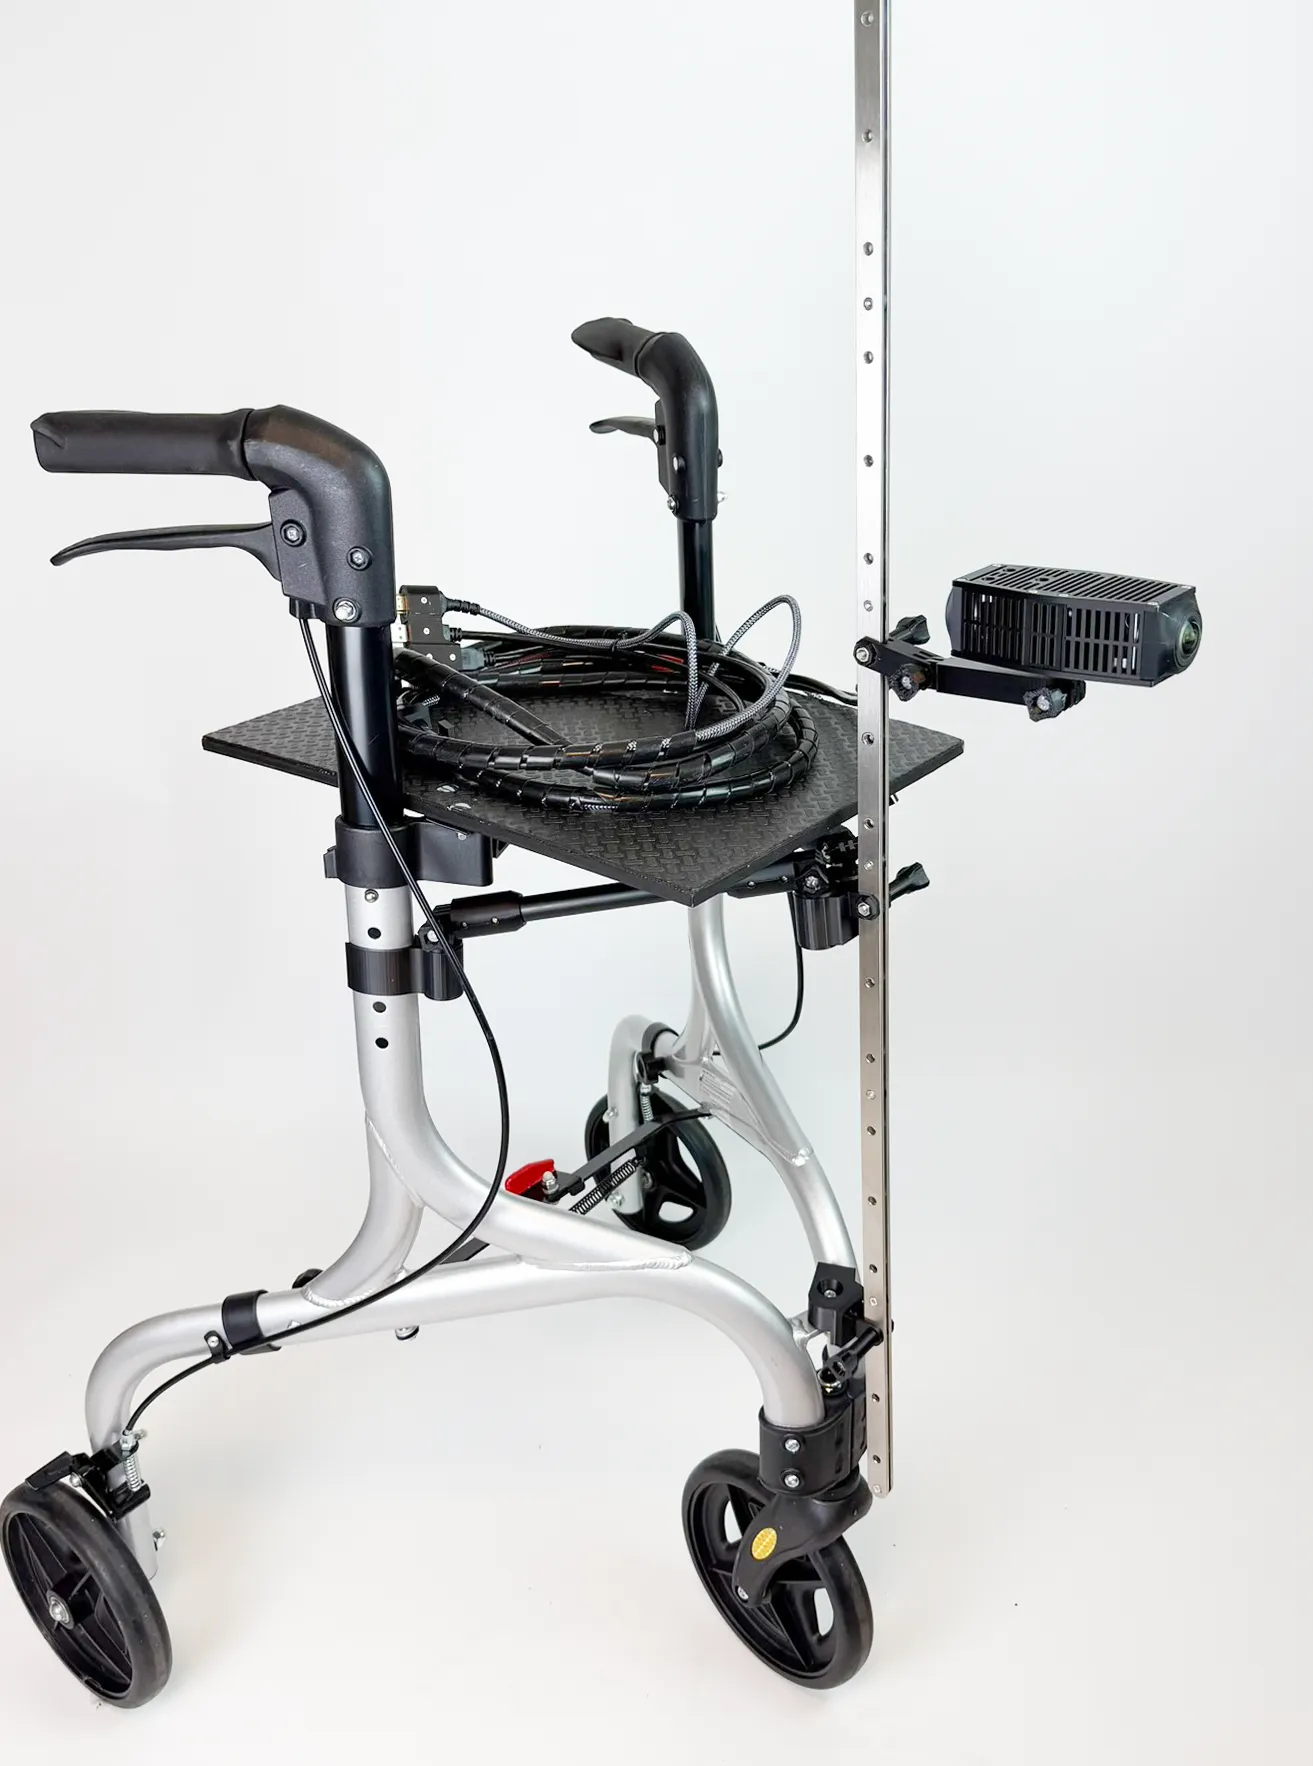
Finally, attach the camera. Depending on the camera's position, you'll need to route the cables around the rollator so they don't drag on the floor. To do this, use the cable guides and the hooks under the laptop compartment.
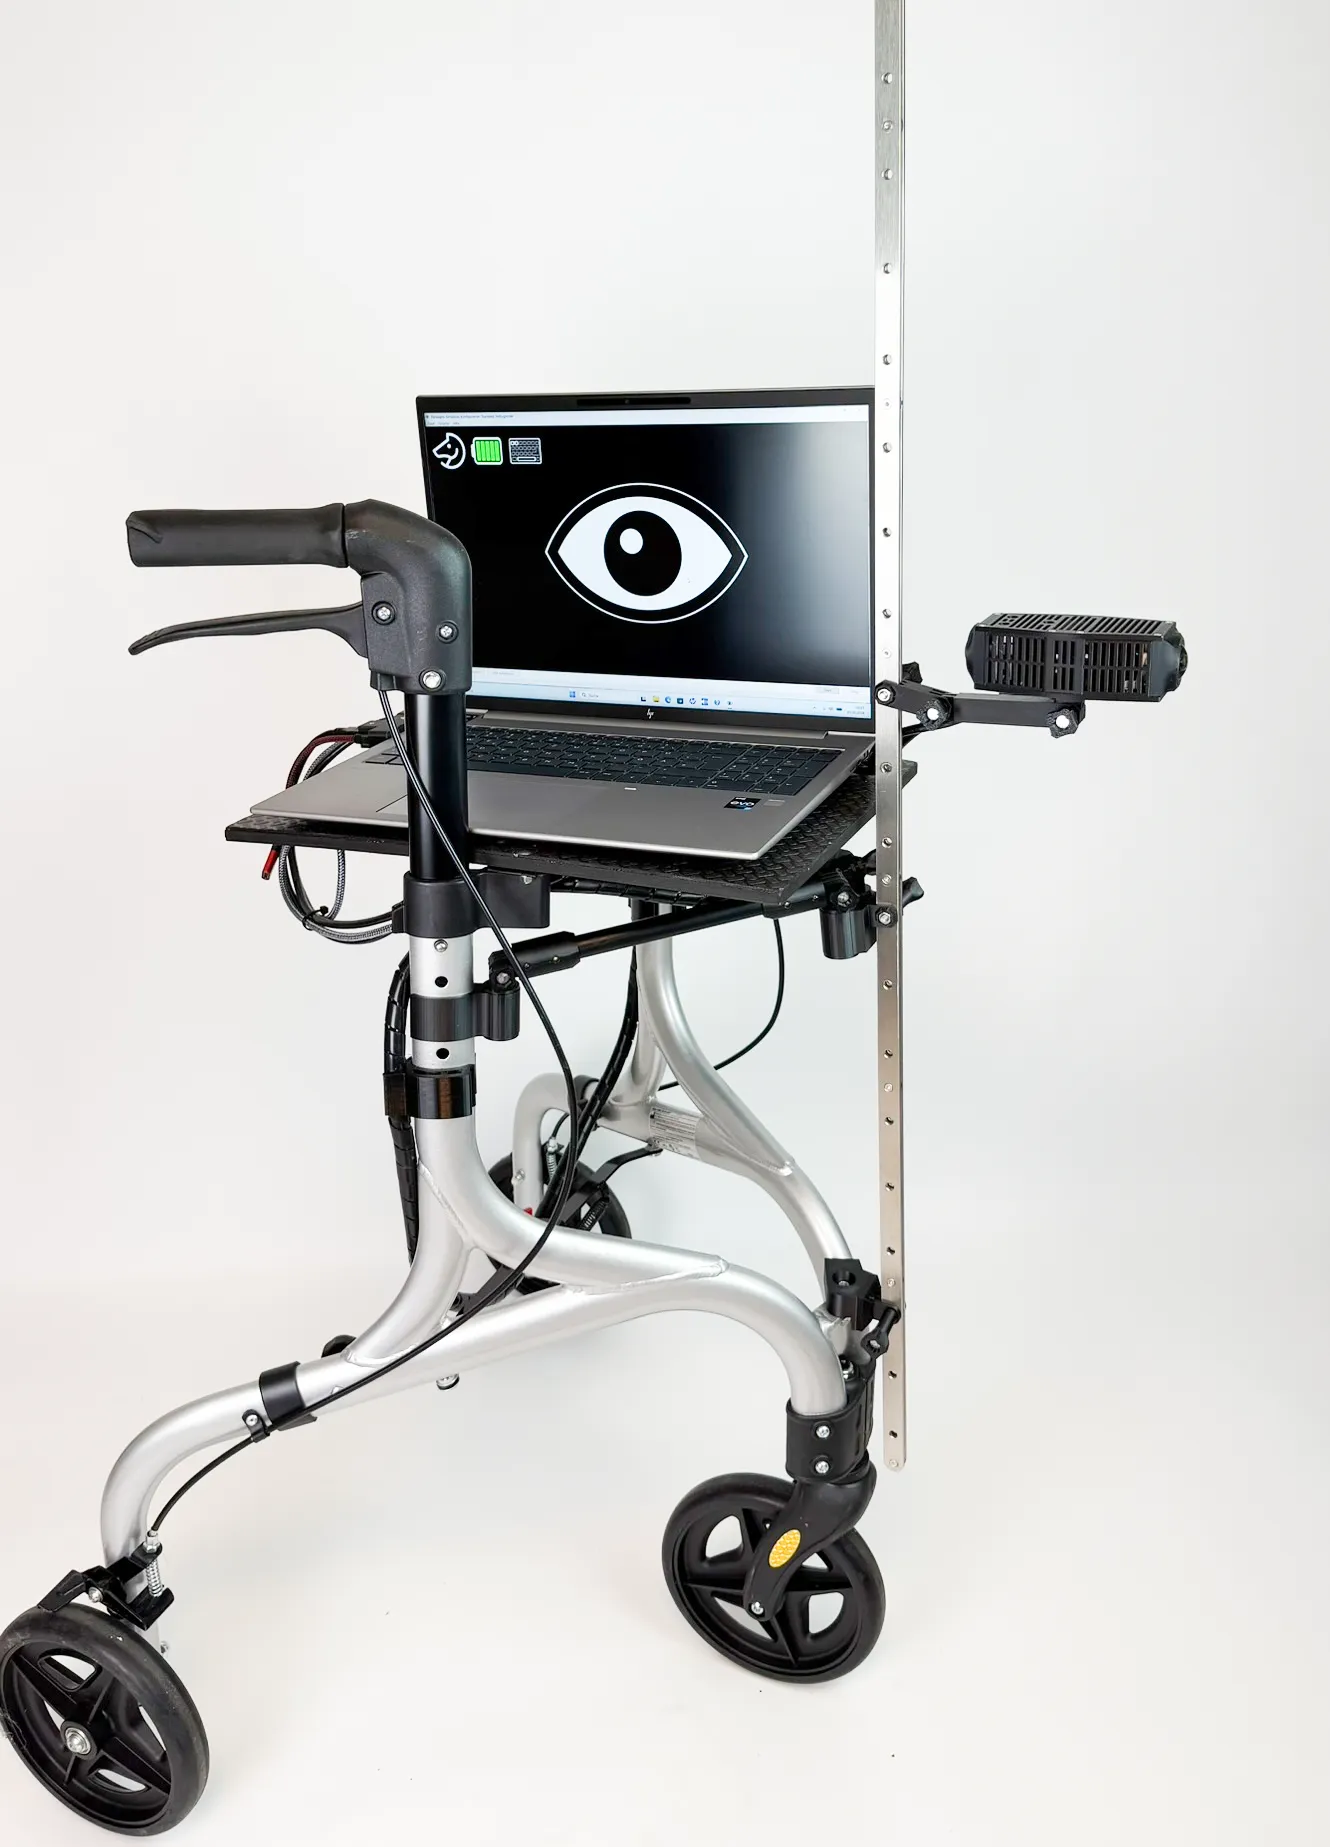
The rollator is now ready for use. We wish you the best of luck and hope you’ll successfully simulate the various animals of different sizes.
We are working on the future. For you.